
Korean Soy Marinated Eggs Bursting with Umami Flavor
The Emotional Hook
You know, there was a time when anything cooked in my kitchen had a 50% chance of being edible. I’m talking about the early years when I was just trying to microwave water without burning my kitchen down (don’t ask). But one day, after a particularly embarrassing attempt at dinner that involved way too much chili powder and an unfortunate misunderstanding with a carton of eggs, I stumbled upon a recipe for Korean soy marinated eggs. That day changed everything.
I cracked an egg into my bowl, and I watched as it turned from a bland little orby thing into a beautifully marinated nugget of flavor magic. I almost cried from joy. Okay, let’s be real—I definitely did cry a little. Part tears of happiness and part relief that I’d actually made something that didn’t resemble a science experiment gone wrong. So here we are now. This recipe has become one of my go-to snacks, an utterly glorious solution for when my dinner creativity has hit a wall or when I’m feeling a bit sorry for myself. Trust me on this one—you don’t want to skip out on trying these.
The "Why This Matters" Paragraph
Let’s face it, life is chaotic enough. Sometimes you need something that takes absolutely no effort but still feels fancy; something that shows you’ve got your act together without actually doing much of anything. Enter my Korean soy marinated eggs. These gems are like a comforting hug when you need it most—the ultimate snack for when you’re binge-watching some mindless reality show, feeling a bit peckish mid-afternoon, or just need a dose of umami to keep your spirits up. They say the best things in life are simple, right? Well, this is your proof.
Before You Start
- Don’t have sushi soy sauce? Use regular soy sauce. You won’t lose your umami card, I promise.
- The secret tool? A ziploc bag for marinating, of course. It’s probably sitting in a drawer gathering dust. Put it to use!
- If your toddler starts melting down at step 3 (like mine always does), just give them a dry egg shell to play with. Kids love stuff like that!
- I recommend pouring yourself a calming cup of green tea while you make this. Seriously, it helps.
Ingredients List with Personal Notes
- 6 large eggs (I go for free-range because they just taste better—trust me, you’ll notice.)
- 1/2 cup soy sauce (I use Kikkoman because I find it has the best flavour for this.)
- 1 tablespoon rice vinegar (A splash of acidity takes these eggs to the next level.)
- 1 tablespoon mirin (For that sweetness, my husband always laughs at my Japanese pantry but hey—it’s worth it!)
- 1 teaspoon sesame oil (Because a little nuttiness never hurts.)
- 1/2 teaspoon garlic powder (I know, it’s not fresh garlic, but we’re keeping it simple here.)
- 1/2 teaspoon finely chopped green onions (Optional, if you want to impress company—you do you!)
The Step-by-Step with Stories
Step 1: Boil the Eggs
First things first, let’s get those eggs cooking. Fill a pot with water and bring it to a rolling boil. Once it’s bubbling like the cauldron from a Halloween movie, carefully lower your eggs in. Gently, alright? You’re not trying to win an Olympic event here.
- Why this step matters: The key here is to cook the eggs to the perfect hard-boiled stage, which takes about 9 minutes for those beautifully set yolks.
- Common mistake here: Overcooking them. Yes, nobody wants that rubbery texture.
- My personal hack: If you forget to set a timer, just enjoy a guilty pleasure show while waiting—you’ll have a better time, I promise!
Step 2: Ice Bath Time
As soon as those little ovals have been cooking for 9 minutes, get them out and pop them straight into an ice bath. Yeah, it sounds fancy but it’s just cold water with ice.
- The sensory cue: You’ll know they’re perfectly cooked when they’re hot but cool to touch after the ice encounter.
- Anecdote: This is the bit where my little one asks if the eggs are swimming. I’ve had the most delightful conversations about egg marathons thanks to this step. Who knew?
Step 3: The Marinating Magic
Once your eggs are cooled down, peel them—this part can be a little bit of an ordeal. Just wash your hands after, or else you’ll be noticing bits of shell for days.
-
Measure out your soy sauce, rice vinegar, mirin, sesame oil, and garlic powder into a bowl or a ziploc bag (I usually use the ziploc—saves on dishes).
-
Very gently place those peeled eggs in. I usually do about three at a time.
-
Seal the bag, and give it a little squish to ensure the eggs are coating evenly.
-
Common mistake here: Skipping the marinating phase. Just don’t do that; it’s like having plain bread when you could have garlic bread. Seriously people.
-
My hack: I’ve been known to marinate these eggs overnight for maximum flavour. If you can wait.
Step 4: Let It Chill
Pop your bag of marinating eggs in the fridge for at least an hour. If I’m making them for a gathering (if I can keep them away from my own snacking), I’ll usually prep them a day ahead.
- If you need to pause because life happens: These can stay in the marinade for up to 24 hours. Just make sure to check every few hours so they don’t get too salty.
Step 5: Serve It Up
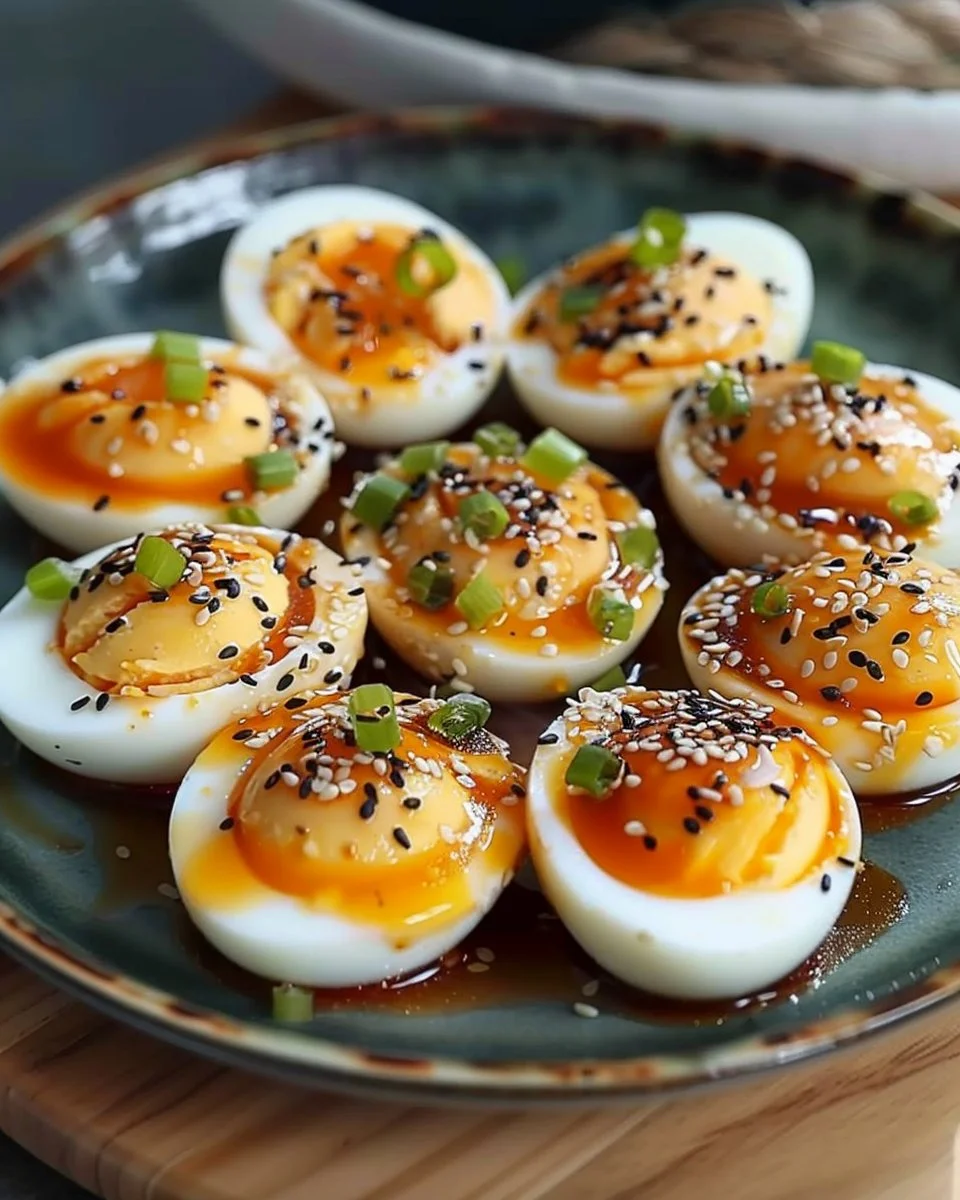
You’re finally at the point where you can enjoy these beauties! I usually cut mine in half to showcase that beautiful jammy yolk. Trust me, it’s a vibe.
- How to serve it with personality: I dish them up in a simple white bowl with a sprinkle of green onion on top. Because presentation matters, even if it’s just for me!
The Troubleshooting Real Life Section
- If you burn the bottom of the pot: Blame it on the eggs taking longer than expected. But really, turn down the heat and just scrub it later anyway.
- If you’re out of mirin: Just a touch of honey will work wonders! Yes, really.
- If it’s just not working: Well, there’s always takeout. A sushi platter can brighten even the worst day.
Serving Story
I usually serve these Korean soy marinated eggs when my friends come over for a glass of wine. I toss them onto a lovely wooden board, alongside some crisp rice crackers and maybe even a bit of kimchi if I’m feeling inspired. Nothing makes you feel like a life guru quite like a lovely platter of snacks.
Honesty alert: sometimes, we just eat ‘em right out of the bag while trying to catch up on life. It’s a perfect excuse to keep talking while munching.
The "When I Make This" Story
I make these on Sundays, usually after I do my grocery run. The kids are winding down from the weekend chaos, and my husband is too busy watching sports to notice what I’m doing in the kitchen. So while I putter about, I indulge in my guilty pleasure podcast (currently about unsolved mysteries; don’t ask).
You know what I’ve realised? The cleanup takes about 5 minutes because you don’t actually have to cook anything! Such a win.
The Conversational Close
So there you have it—Korean soy marinated eggs that packed with bursting umami flavour. They might not be fancy, but they remind me of a simpler time when cooking felt like an art, even if half the time it ended up being a circus.
This little recipe has seen me through lazy afternoons, dinner parties, and even the odd ‘you-need-to-say-sorry’ moment (because these are just that good). It might not be perfect, but it’s mine, and I cherish it. If you whip these up, I wanna know. Tag me, send me a pic, or just enjoy them quietly while lounging on the couch.
And by the way, what’s your go-to comfort food? Mine changes, but as of late, it’s definitely these marinated gems. Happy cooking!


Korean Soy Marinated Eggs
Ingredients
Method
- Fill a pot with water and bring it to a rolling boil. Carefully lower the eggs in.
- Cook the eggs for about 9 minutes for perfect hard-boiled yolks.
- Once cooked, transfer the eggs to an ice bath immediately to cool them down.
- Peel the eggs once they are cooled.
- Measure out soy sauce, rice vinegar, mirin, sesame oil, and garlic powder in a bowl or ziploc bag.
- Gently place the peeled eggs in the marinade and seal the bag, squishing to coat evenly.
- Marinate in the fridge for at least 1 hour, or up to 24 hours for maximum flavor.
- Slice the marinated eggs in half to showcase the beautiful jammy yolk.
- Serve in a simple white bowl with a sprinkle of green onion on top.