
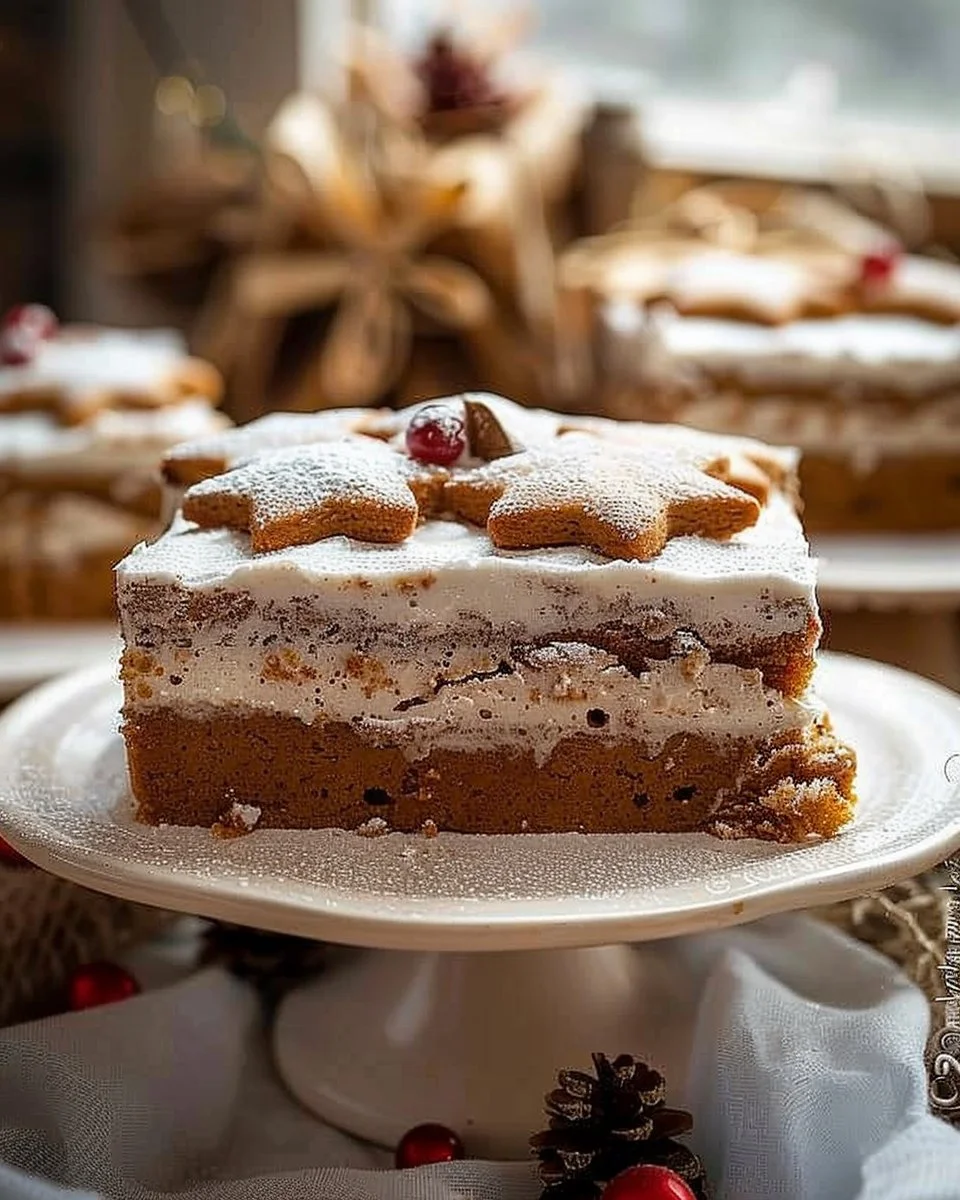
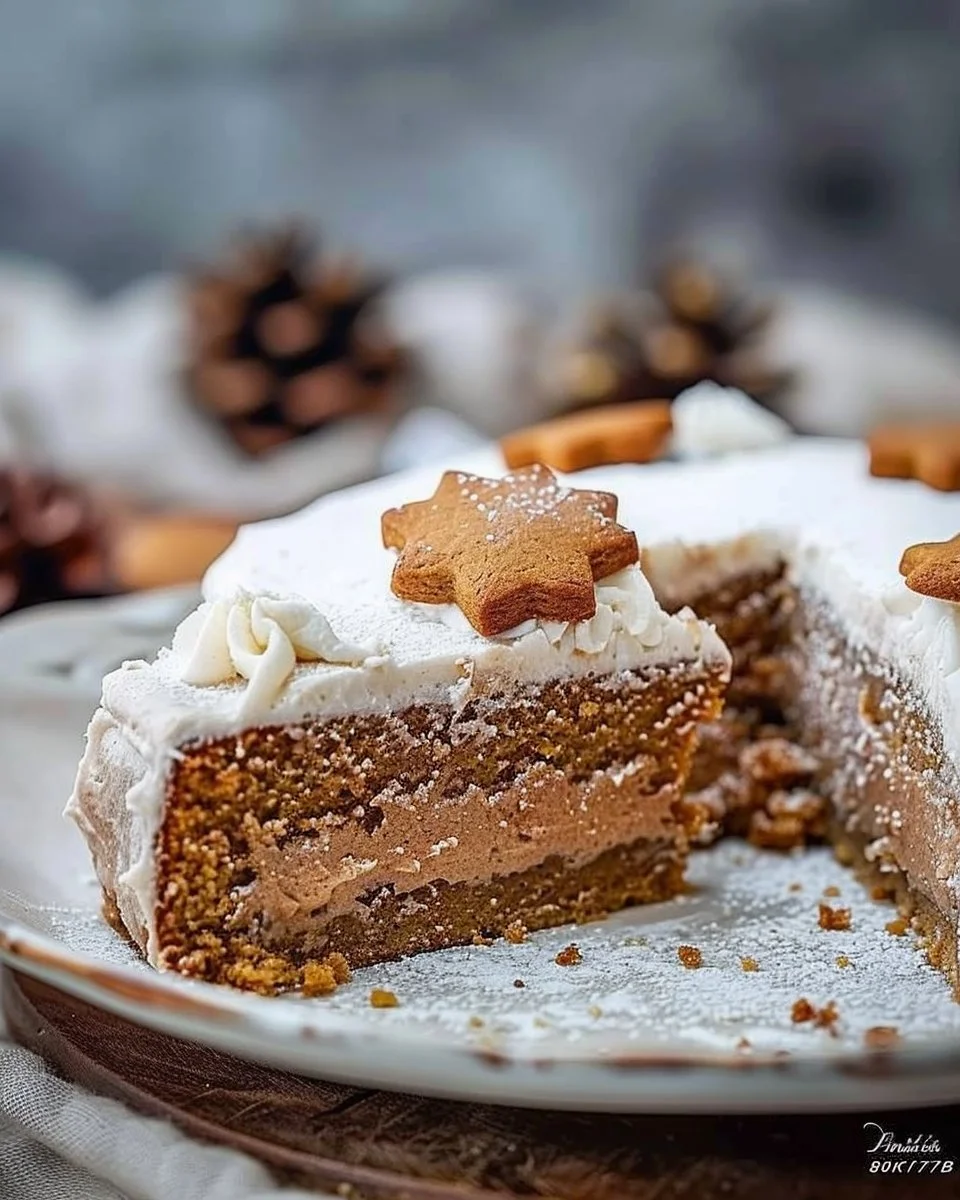
The Magic of Gingerbread Ermine Cake: A Slice of Comfort
The Emotional Hook
The first time I tried making a Gingerbread Ermine Cake, it wasn’t pretty. I mean, it was epic in all the wrong ways. I was attempting to impress my in-laws—who happen to be hard-core dessert aficionados—when disaster struck. Picture this: I’m in the kitchen, flour everywhere, a frantic “Where’s the ginger?” moment, and my son Sam running around asking if he can “help” by adding a whole tablespoon of cinnamon instead. (Spoiler alert: he was very excited about it.) As I stood there, covered in batter and trying not to cry over my poorly-timed baking adventure, my wise mother-in-law walked in. She took one look and said, “Well, at least it’s got character!” Now, I whip up this cake when I need to wrap someone in a warm hug of spices and sweetness, and more importantly, to remind myself that kitchen mishaps can lead to delightful surprises. Let’s embark on a safer path together.
Why This Matters
This isn’t just any ordinary cake. It’s the heartwarming answer to a question we all ask at some point: “What do I make when I want to feel comforted?” Whether you’re feeling the dull thud of a long day or trying to impress someone special without breaking the bank (or your sanity), this Gingerbread Ermine Cake is your glorious solution. It’s a soft, spiced hug wrapped in sweet ermine frosting that tastes like love and nostalgia. And trust me on this—it’s what you want to serve when you need to reassure yourself that everything can still be just a bit magical.
Before You Start
- Okay, let’s be real: If you only have regular granulated sugar instead of brown sugar, it’s going to change the cake’s depth of flavour. Use it if you must, but if you can, get your hands on that brown sugar.
- The secret nobody tells you: Room temperature ingredients are key. Seriously, don’t skip this. Cold butter will leave you with… well, a less-than-ideal cake.
- Don’t do what I did: I forgot to preheat my oven once and had a sad, flat cake as a result. Trust me, heat your oven while you prep!
- And let’s be honest—pour yourself a glass of mulled wine while you’re at it. You deserve it, especially when the temperature’s dropping outside and you can already smell the Christmas spice in the air.
Ingredients List with Personal Notes
- 2 cups all-purpose flour (I use the generic stuff, but if you’ve got a fancy brand, go for it!)
- 1 tsp baking soda (No one likes a dense cake, so this is crucial.)
- 2 tsp ground ginger (I use the pretty jars from the supermarket, but I won’t tell if you raid the pantry for the old stuff.)
- 1 tsp ground cinnamon (Cinnamon just makes everything better, don’t you think?)
- ½ tsp ground cloves (Enriches that gingerbread feel. My grandma would sprinkle this in everything.)
- ½ tsp salt (Any salt will do, but I usually reach for the sea salt.)
- ¾ cup unsalted butter, softened (Full disclosure: I always keep a stash of butter in the fridge just in case I feel like getting spontaneous with baking.)
- 1 cup brown sugar, packed (Always buy more than you think you’ll need, trust me.)
- ½ cup granulated sugar (The cake and my coffee both need a touch of sweetness.)
- 3 large eggs (If they’re local farm eggs, bonus points for you!)
- ½ cup molasses (This is the dark magic that makes everything rich and complex.)
- 1 cup buttermilk or milk (I use whatever is left in the fridge; the cake doesn’t judge!)
Step-by-Step with Stories
Step 1: Preheat your oven to 350°F (175°C)
Okay, let’s be real—this step often gets overlooked, and I can’t stress enough how important it is. Your oven should be warm and ready to go when you pop that cake in. I actually set my timer to remind me—because I learned the hard way that anything less leads to a sad, flat cake.
Step 2: Grease and flour your cake pans
Unfortunately, I’ve had far too many moments where I thought “That’ll be fine” only to end up wrestling with a very stubborn cake that decided to cling to the sides. So, let’s do this right. Grab some cooking spray or good ol’ butter, then dust with flour. You’ll thank me later when your cake slides out nicely.
Step 3: In a bowl, combine your dry ingredients
Mix together flour, baking soda, spices, and salt. Here’s the thing—if you ever find yourself in a hurry, don’t skip this step. You want those spices evenly distributed or you might get a cinnamon explosion in one bite and no ginger in another. Not ideal.
Tip: This is also where I catch a breather. Sometimes a quick dance to a holiday tune helps me unwind.
Step 4: Cream your butter and sugars
In a separate bowl, beat the butter, brown sugar, and granulated sugar until light and fluffy. It’s an important step because this aeration is what helps the cake rise. Don’t rush it. I mean it. I’ve walked away from the mixer only to find a sad bowl of goo when I returned.
“Why does everything I own look like a baking disaster?” I mutter as I clean the counter for the umpteenth time.
Step 5: Add the eggs one by one
Adding the eggs slowly helps with that lovely creamy texture. Don’t just dump them all in at once. Wait until one is fully incorporated before adding the next. It’s a small but crucial detail.
Little known fact: my son Sam thinks he’s a master egg-cracker. You just wait until you get a half-shell in your batter one day.
Step 6: Mix in the molasses
It’s sticky and gooey, and will require a bit of muscle to get it all out of the measuring cup. But honestly, it’s totally worth it. The smell alone is heavenly.
I can almost hear the angels sing when this hits the bowl.
Step 7: Alternate adding dry and wet ingredients
Now, start adding your flour mixture and buttermilk. Alternate between the two until everything is combined. Don’t overmix—just mix enough to bring it all together. This part always reminds me to slow down; I can be a little too eager, trying to shove my cake into the oven before it’s actually ready.
Step 8: Pour into prepared pans and bake
Now it’s time for the magic! Pour your batter evenly into the two prepared pans and pop them in the oven. You’ll know they’re done when a toothpick comes out clean after being poked in the centre.
While they bake, I usually do the “waiting dance.” You know the one, where you check the oven every two minutes like a toddler waiting for the cookie jar.
Troubleshooting Real Life
- If you burn the bottom: Don’t panic. Let it cool completely before trying to salvage what’s left. Sometimes, when it’s cooled, you can cut off the black bits and salvage most of it. Or just accept that you’ll be having “crusty gingerbread crumbs” for dessert tonight.
- Out of buttermilk? Mix 1 cup of milk with 1 tablespoon of vinegar or lemon juice and let it sit for 5 minutes. It works like a charm, don’t worry!
- Need to pause? Just cover the bowl in clingfilm and pop it in the fridge. When you return, let it warm up a bit before continuing; cold batter isn’t happy batter.
- It’s just not working? Take the evening off, order a takeaway, and don’t feel guilty about it. Sometimes you just need a break, and that’s perfectly okay.
The Serving Story
I serve this cake in simple, rustic dishes, partly because I like the vibe and partly because it makes the cake feel cozier. Think of it as your favourite well-loved sweater. But if I’m being honest, sometimes we just grab a piece straight from the pan while bearing witness to our family’s latest Netflix binge. No judgement here, just comfort!
And let’s talk leftovers: they taste even better the next day. The flavours deepen, and you find yourself with a delightful snack waiting for you. It’s like a tasty little gift that keeps on giving.
When I Make This
I usually whip this up on a chilly Sunday afternoon because it gives me a reason to avoid the laundry for just a little longer. While the cake bakes, I’ll fold laundry and promptly forget about it for a bit longer than planned. Sam’s probably watching cartoons and my husband is doing who-knows-what in the other room. When the cake finally cools, we’ll usually dig in after dinner with a cup of tea beside us.
The cleanup takes about 20 minutes—longer if I’m chatting with a friend, which usually turns into a mini cake-praising session. (All the lovely compliments make it feel worthwhile!)
The Conversational Close
This Gingerbread Ermine Cake has seen me through countless Christmas gatherings, rainy afternoons, and even a couple of “I need cake, like, now” emergencies. It’s not the most perfect cake in the world, but it’s mine.
I’d love to hear if you give it a shot! Tag me if you post about it or just enjoy it quietly on your own. Everyone has their comfort food; I’m curious—what’s yours? Mine changes, but right now, it’s this glorious gingerbread delight.
Feel free to join the conversation or share your own stories!

Gingerbread Ermine Cake
Ingredients
Method
- Step 1: Preheat your oven to 350°F (175°C).
- Step 2: Grease and flour your cake pans.
- Step 3: In a bowl, combine your dry ingredients: flour, baking soda, spices, and salt.
- Step 4: Cream your butter and sugars until light and fluffy.
- Step 5: Add the eggs one by one, ensuring each is fully incorporated before adding the next.
- Step 6: Mix in the molasses until well combined.
- Step 7: Alternate adding the dry mixture and buttermilk until just combined.
- Step 8: Pour into prepared pans and bake until a toothpick comes out clean.