Pistachio Raspberry Crunch Cheesecake: The Blessing and the Mess of Kitchen Adventures
The first time I attempted a cheesecake, I felt like I was taming a wild beast in my kitchen. I mean, who knew cream cheese could be so temperamental? Picture this: my best friend Sarah and I were prepping for a big family gathering. We decided to whip up a Pistachio Raspberry Crunch Cheesecake because, you know, nothing says "impress the in-laws" like a colourful dessert with a fancy name. As I was mixing, I sensed a disaster waiting to happen. Spoiler alert: it did. The crust crumbled into what can only be described as a sad little pile of crumbs, and the raspberry layer was too runny. I cried—full-on, messy crying. Sarah just laughed and said, “Next time, let’s try a pie.” But here’s the kicker: I persevered. That disaster taught me more than just how to make cheesecake; I figured out what makes a recipe memorable, and that’s exactly what I want to share with you today.
Okay, let’s be real for a sec. This Pistachio Raspberry Crunch Cheesecake isn’t just a dessert. It’s a bundle of joy for those rough days when I’m overwhelmed and only a slice of something sweet and nutty can fix it. It’s what I pull out of the fridge when I need comfort after a long week of work and school run madness. And trust me, with a household that resembles a tornado zone, this cheesecake has become my go-to recipe that combines a bit of nostalgia with a sprinkle of fancy.
Before You Start
This is where my seasoned home cook brain kicks in. Before you go pulling out your mixer with delight, here’s a bit of advice to save your sanity:
- Ingredient swaps: If you can’t find fresh raspberries (which happens sometimes), frozen ones work just fine. They’re easier to get, but just make sure to drain the excess liquid.
- The nutty secret: If you only have walnuts or almonds instead of pistachios, the cheesecake will still be great—perhaps a bit different in flavour, but good. You do you.
- A little prep: You can make the crust a day ahead. Just wrap it tightly and store it in the fridge. Seriously, thank yourself later for this little move.
- For the moms (and dads) out there: If your toddler starts throwing a tantrum during the raspberry layer prep (like mine does), just hand over a few raw cashews as a distraction. Works like a charm!
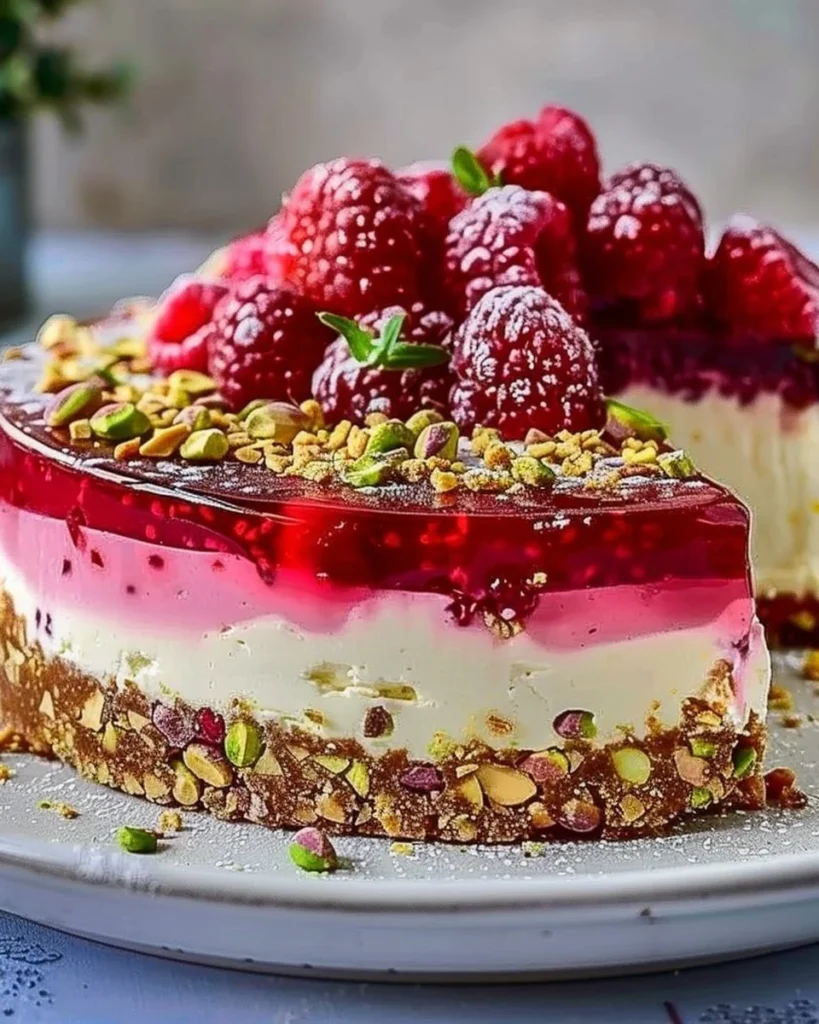
Ingredients
Here’s what you need for the Pistachio Raspberry Crunch Cheesecake.
For the crust:
- 200g digestive biscuits, crushed (I like the plain ones because they do the job nicely)
- 100g melted butter (I use unsalted because I like to control the flavour)
- 50g pistachios, roughly chopped (I get mine from the big jar at Tesco; cheaper and they last forever!)
For the cheesecake filling:
- 500g cream cheese, softened (trust me, you want it soft for easy mixing)
- 200g icing sugar (add more if you like it sweeter, but this is just right)
- 200ml double cream (you’ll want it chilled)
- 200g raspberries (fresh is fantastic, but frozen works if you’re in a pinch)
For the topping:
- 50g pistachios, finely chopped (adds a nice crunch on top)
- 50g raspberries (for a pop of colour—because aesthetics matter in dessert)
- 2 tbsp raspberry jam (totally optional, but yummy)
Step-By-Step Instructions
Step 1: Make the Crust
Practical Instruction: In a bowl, mix the crushed digestive biscuits with melted butter until it resembles wet sand.
Human Insight: This is your base. If it’s too dry, just add a smidge more butter—no one likes a crumbly crust.
Anecdote: Last time I did this with my son, he took it upon himself to eat half of the biscuit crumbs before we even got to the mixing part. Kids, right? Be prepared for those interruptions!
Tip: Use the back of a spoon to really pack it down into the tin. Otherwise, the crust just crumbles away when you cut the slices.
Step 2: Fill the Cheesecake
Practical Instruction: In a big bowl, mix the softened cream cheese until smooth. Gradually add the icing sugar while mixing.
Human Insight: This is where you really want to be diligent. Lumps in your cheesecake are a sign you didn’t mix it long enough. You’ll want it silky.
Anecdote: I remember the first official cheesecake I made with my mum. She insisted we use an electric mixer. I just couldn’t get it right with the whisk and ended up with a twisted arm. But hey, it tastes the same even if it looks a little lumpy, right?
Step 3: Add the Cream
Practical Instruction: Gently fold in the chilled double cream until it’s fully incorporated.
Human Insight: Don’t go overboard here! Too much mixing and you might end up with a strange cheesecake that has no personality.
Tip: If you look closely, you should see little swirls of cream throughout—the sign of a good cheesecake.
Step 4: Incorporating the Raspberries
Practical Instruction: Gently fold in the raspberries so that they maintain their shape.
Human Insight: Check it out and taste for sweetness—if it’s too tart, add more icing sugar here. Trust me, I learned that lesson the hard way during ‘The Great Raspberry Catastrophe’ of last year.
Anecdote: This is where I optimistically invite my kids in to help, thinking they’ll have a blast. Spoiler alert: they just end up fighting over who gets to push the spoon into the bowl. Classic.
Step 5: Layer It Up
Practical Instruction: Pour the cheesecake filling over the crust in your springform pan, smoothing the top with a spatula.
Human Insight: If it’s not smooth on top, it’ll be all lumpy when you cut it later on.
Anecdote: The last time I made it, I didn’t level it properly. No joke, it looked like a very stylish rollercoaster on the plate. But guess what? Everyone ate it anyway!
Step 6: Chill and Set
Practical Instruction: Cover with cling film and chill in the fridge for at least 4 hours, but overnight if you can wait.
Human Insight: This is the most torture part of the whole process. Just remember, good things come to those who wait.
Tip: I use this time to binge-watch some shows or maybe even clean my disaster of a kitchen (though, full disclosure, that rarely happens).
Troubleshooting Real Life
- If you forget to take out your cream cheese and it’s still cold: Pop it in the microwave for 10 seconds to soften it a bit. It should help!
- Need to pause?: Just cover it tightly and pop it in the fridge while you sort out whatever chaos just interrupted you.
- What if the crust burnt?: Trust me, you can just scrape the burnt bits off and layer it again.
- If it’s just not working: Don’t stress. This cheesecake is forgiving; if it flops, toss it in a big bowl and call it a parfait. Your family won’t care, they’ll still eat it—just throw some raspberries on top!
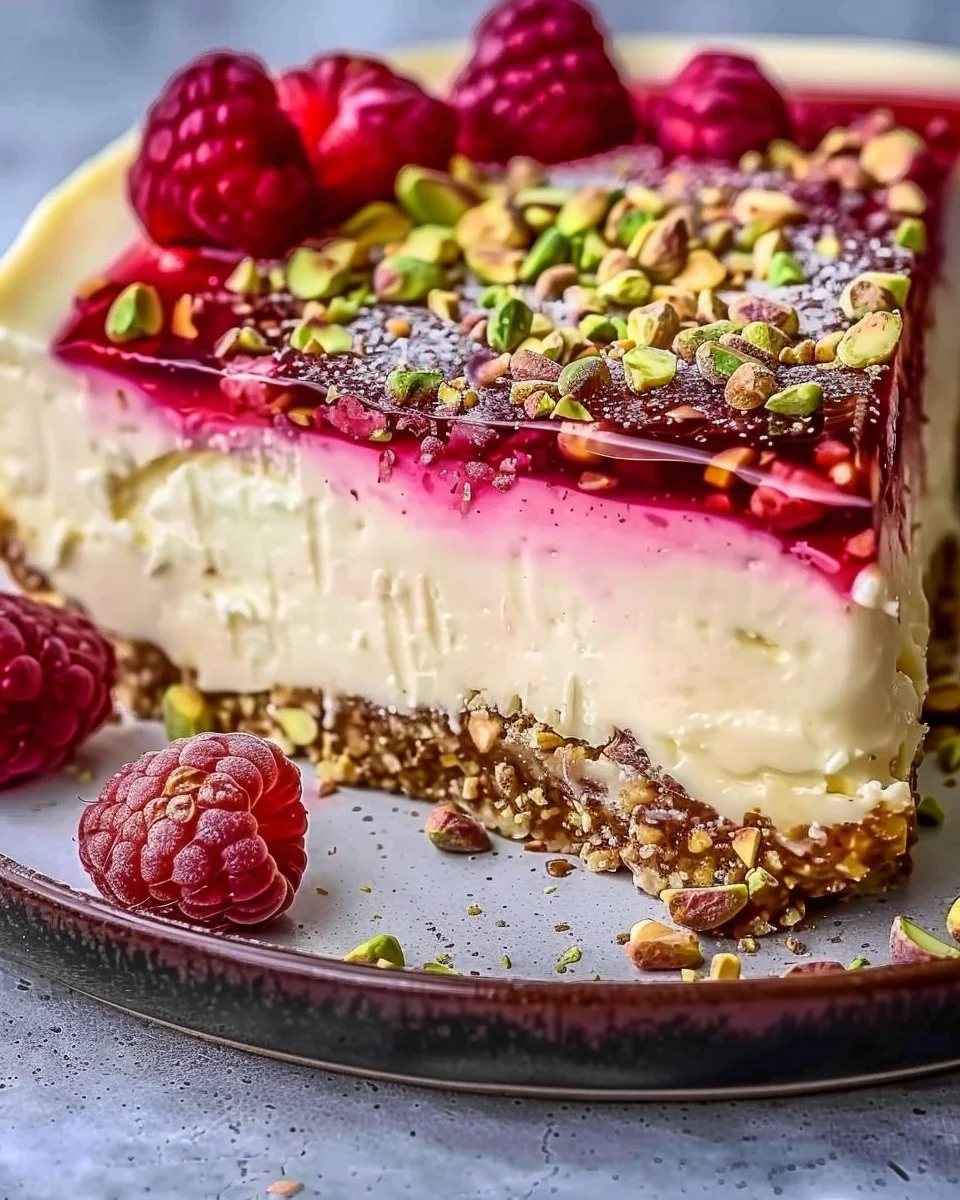
Serving with Style
I usually serve this cheesecake straight from the fridge so it’s nice and firm. I like to use a white porcelain cake stand, because hello, it makes everything look more fabulous—even if my kitchen is still a mess. And for the side, we usually grab some coffee—it pairs so well with cheesecake.
A little raspberry jam spooned on top adds a glaze of sweetness. And listen: leftovers? They taste even better the next day, trust me. So if you end up making a bit too much, don’t you worry.
When I Make This
I typically whip up this cheesecake on Sunday afternoons when everything is still. But let’s be real, that’s the time chaos usually happens in my house: understand that you might have to wipe some hands and chase a dog around while you bake. But, it’s worth it for that cool, creamy bite. It’s a nice change from Sunday roasts, and everybody loves it.
After it’s in the fridge, while waiting for it to set, I usually try to catch up on laundry (if I’m lucky). But the best part? We usually eat it together as a family in the living room while watching our favourite movie. Because that’s far more important than dealing with the mess!
The Conversational Close
This recipe has gotten me through many a family gathering and a handful of meltdowns. It’s been my dessert lifeline for both good times and bad. It might not be perfect, but it’s mine.
I’d love to hear if you make it—please tag me on social media or just enjoy it in delightful silence! And hey, what’s your go-to comfort food? Mine changes with the seasons, but for now, it’s definitely this Pistachio Raspberry Crunch Cheesecake.
So, are you ready to embrace the joy and mess of cheesecake-making? Let’s get to it and make some memories!


Pistachio Raspberry Crunch Cheesecake
Ingredients
Method
- In a bowl, mix the crushed digestive biscuits with melted butter until it resembles wet sand.
- Pack the mixture into a springform pan using the back of a spoon.
- In a big bowl, mix the softened cream cheese until smooth.
- Gradually add the icing sugar while mixing until combined.
- Gently fold in the chilled double cream until fully incorporated.
- Gently fold in the raspberries, being careful not to break them.
- Taste and add more icing sugar if it's too tart.
- Pour the cheesecake filling over the crust and smooth the top with a spatula.
- Cover with cling film and chill in the fridge for at least 4 hours, preferably overnight.