The Apple Bars That Made Me a Better Baker
The first time I tried to make these apple bars, it was a disaster of truly epic proportions. I’m talking about a kitchen scene that looked like a war zone—flour everywhere (seriously, I think I created a new shade of white), a broken wooden spoon, and a gooey, unidentifiable mass that closely resembled something that might be found in a rubbish bin. My daughter, Emily, walked in right as I was sobbing into the mixing bowl, and without missing a beat, she said, “Mum, maybe less crying and more mixing?” At that moment, I realized how far I’d strayed from my goal of creating a comforting treat for my family. Let me tell you, that was more than five years ago, and now, these apple bars are my go-to recipe for cozy family gatherings, school bake sales, or just when I need a sweet pick-me-up.
Why This Matters
These apple bars aren’t just your regular dessert—they’re little packages of love. It’s the kind of treat that says “I care about you” without the cheese factor (although a cheesy pun here and there is always welcome in my kitchen). They’ve brought my family together through countless ups and downs, reminding us that it’s the simple things that really matter. Need to cheer someone up? Whip up a batch. Want to impress your in-laws? Trust me on this—a plateful of these bars will do the trick. And if you’re knee-deep in life’s chaos, these delightfully gooey treats will help you remember that sweet moments don’t always require perfection.
Before You Start
- If you don’t have Granny Smith apples, it’s okay to use whatever you’ve got. Just aim for something tart. Trust me, it makes all the difference.
- The secret weapon here is a microplane. If you don’t have one, get your hands on one—it zests and grates better than you can imagine (and is so much easier than a regular grater).
- If your toddler suddenly decides that this is the moment for a full-blown meltdown (I’ve been there), don’t panic! Just stick the mixture in the fridge for a quick cool-down while you resolve things.
- Pair this bake with a lovely cup of chai tea. Seriously, I’m telling you, one sip and all your stresses will just melt away.
Ingredients List (with Personal Notes)
- 2 cups all-purpose flour (I often use plain flour, but if you’re feeling fancy, a bit of whole wheat gives it a lovely nutty flavour)
- 1 tsp baking powder (the unsung hero of this recipe—don’t skimp on it!)
- 1/2 tsp baking soda (trust me, these little bubbles are key; you want your bars to rise)
- 1/2 tsp salt (my dad always said, “A whisper of salt makes the sweet sing!” so true)
- 1 tsp ground cinnamon (because what’s an apple dessert without a sprinkling of this?)
- 1/2 cup unsalted butter, melted (I use the Lidl brand because it’s economical and works like a charm)
- 1 cup brown sugar (I prefer light brown sugar for a hint of caramel notes)
- 1 large egg (wild card here: I sometimes add an extra yolk to make it rich)
- 1 tsp vanilla extract (the best stuff is from Madagascar, but the supermarket one does just fine)
- 2 cups apples, peeled and chopped (I usually go for Granny Smith because the tartness pairs perfectly with the sweetness)
- 1/2 cup chopped nuts (walnuts or pecans) (optional, but they add a beautiful crunch; I often leave them out because my son is anti-nut)
- Optional: icing sugar for dusting (just to make it look pretty, of course!)
Step-by-Step Instructions with Stories
Step 1: Preheat Your Oven
Preheat your oven to 180°C (350°F). Line a 9×13 inch baking dish with parchment paper for easy removal later.
Why this matters: Preheating ensures your bars rise beautifully and cook evenly.
My personal hack: If you’ve forgotten to preheat, you can pop a small pan of water in the oven to create steam, which helps with moisture. Just don’t forget about it!
Step 2: Combine Dry Ingredients
In a bowl, whisk together the flour, baking powder, baking soda, salt, and cinnamon.
Common mistake here: Don’t skip the whisking! It’s essential for ensuring an even distribution of baking power.
Anecdote: This step reminds me of my best friend Lucy and I, back in school, trying to follow a recipe and nearly combusting from laughter when we accidentally used cayenne pepper instead of cinnamon. The cinnamon roll incident of 1996—don’t ask!
Step 3: Mix Wet Ingredients
In a large bowl, mix together melted butter, brown sugar, egg, and vanilla extract until well blended.
If you’re multitasking: This is the perfect time to chop your apples and put on some tunes! I like to listen to a bit of Adele while I cook, it makes everything feel a little more epic.
Step 4: Combine the Mixtures
Gradually fold in the dry ingredients into the wet mixture until just combined. Some flour lumps are okay—don’t overmix!
Why this step matters: Overmixing can lead to dense, sad bars, and nobody wants that.
Step 5: Add in the Apples and Nuts
Fold in your chopped apples and nuts (if using). The smell is absolutely intoxicating!
The sensory cue: You’ll know you’re doing it right when your kitchen begins to smell like a little apple orchard.
Anecdote: Can we talk about my daughter Emily sneaking bites of the raw batter every single time? I’ve made peace with it; it’s a part of our ritual now.
Step 6: Pour and Bake
Pour the batter into the prepared baking dish and smooth out the top. Bake for about 25-30 minutes or until a toothpick inserted into the centre comes out clean.
What to do if you get interrupted: If you must leave, just cover it with a towel—just be sure your smoke alarm isn’t on the brink!
Step 7: Cool and Cut
Once baked, remove from the oven and let cool in the pan for about 10 minutes before transferring to a wire rack to cool completely.
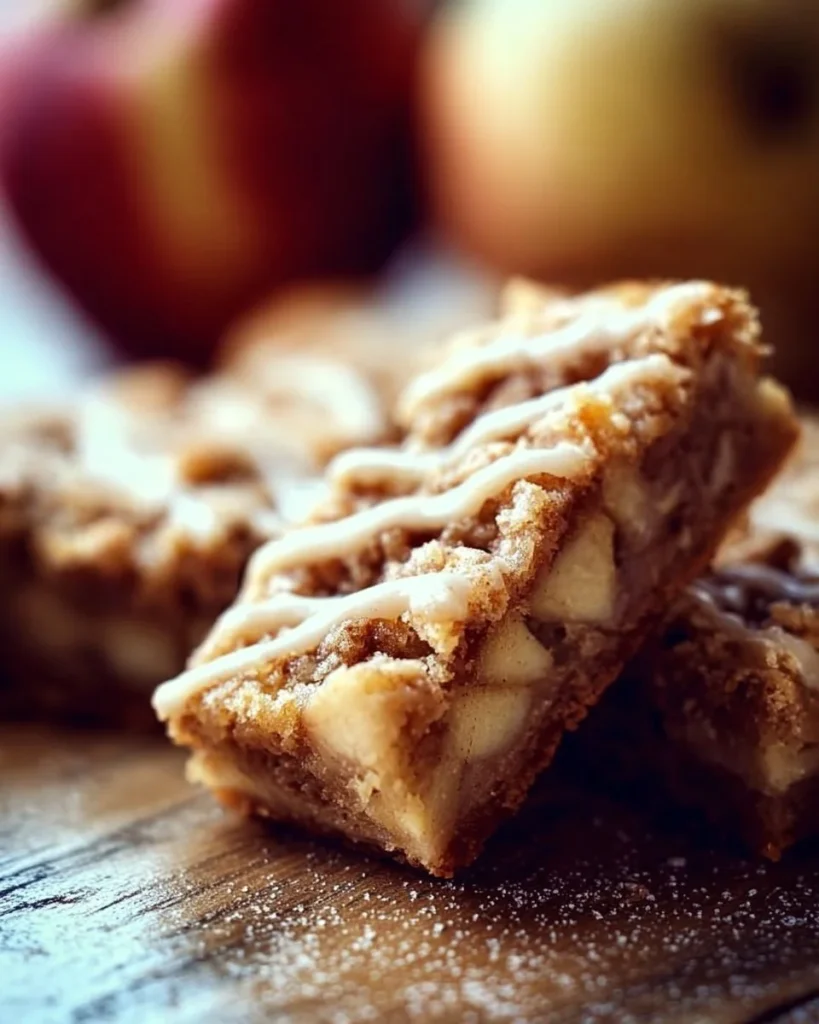
How to serve it with personality: You can drizzle a simple vanilla icing or dust it with icing sugar. I often serve mine straight from the pan because a little mess never hurt anyone!
Troubleshooting Real Life
- If you burn the bottom: Don’t toss it! Just slice the burnt edges off; nobody will ever know the difference.
- If you’re out of brown sugar: You can use white sugar mixed with some molasses (1 cup sugar + 1 tbsp molasses).
- If it just doesn’t work: Remember, I’ve had my share of kitchen blunders. If this recipe fails you, it’s not you—sometimes it just happens. Maybe call for takeout and let it go.
The "When I Make This" Story
I usually make these apple bars on cozy autumn weekends when the leaves are turning gold and the air is crisp. It’s become a kind of tradition! While they’re in the oven, I fold laundry and brew a batch of chai tea to sip while I wait (the best waiting game, if I do say so myself). My family and I gather around the kitchen island, watching the steam rise from the bars as I cut them into squares. Cleanup takes me about ten minutes, but it doesn’t feel burdensome—the sweet aroma still lingers, reminding us of our fun times spent together.
The Conversational Close
These apple bars have truly been a part of my life during countless milestones—birthdays, bake sales, and those moments when we simply need a treat to lift our spirits. They might not be perfect, but they’re my kind of perfect. It’s these memories that make them extra special. I’d love to hear if you decide to whip up a batch; tag me in your photos or just enjoy them quietly while sharing a moment of comfort.
So what’s your go-to comfort food? Mine might just be these gooey, apple-filled delights, especially when I pull them out of the oven with a little sprinkling of icing sugar atop. They remind me that sometimes, all you need is a bit of sweetness in your life—every bite tells a story.

Apple Bars
Ingredients
Method
- Preheat your oven to 180°C (350°F) and line a 9x13 inch baking dish with parchment paper.
- In a bowl, whisk together the flour, baking powder, baking soda, salt, and cinnamon.
- In a large bowl, mix melted butter, brown sugar, egg, and vanilla extract until well blended.
- Gradually fold the dry ingredients into the wet mixture until just combined—some lumps are okay.
- Fold in the chopped apples and nuts (if using).
- Pour the batter into the prepared baking dish and smooth out the top.
- Bake for about 25-30 minutes or until a toothpick inserted in the center comes out clean.
- Cool in the pan for about 10 minutes before transferring to a wire rack to cool completely.
- Dust with icing sugar if desired before serving.