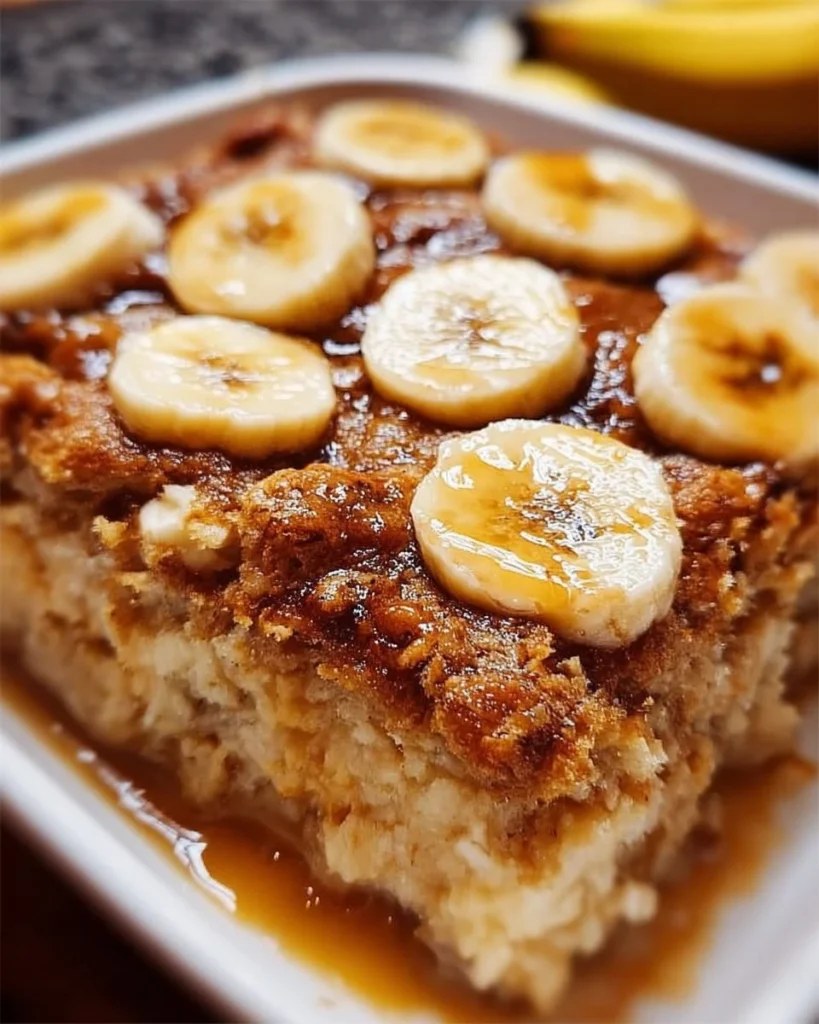
Irresistible Banana Bread Cobbler with a Gooey Twist
The Emotional Hook
The first time I tried to make banana bread, let me tell you, it was a full-on disaster. I don’t mean just a little flour dusting everywhere; I mean major chaos. Picture me, a well-meaning but utterly clueless cook, standing in my kitchen with what I thought was a fantastic idea. I had a bunch of overripe bananas practically begging for attention, and all I could think was, "How hard can this be?"
By the time I’d finished, there was batter on the ceiling (don’t ask me how) and my sweet toddler, Ben, was crying because I wouldn’t let him help—turns out, kids and mixers are a bad combo. My husband, Tom, walked in, surveyed the state of my kitchen (and my sanity), grinned, and said, “Well, at least you’re not burning water this time!” Oh, but how I wished I had that simpler problem. That disaster turned into a fond memory, and years later, it led me to this banana bread cobbler that has a gooey twist that can turn any ordinary day into an extraordinary one.
I make this cobbler when I need a little comfort or to impress a friend with a heartfelt dessert without breaking the bank. Trust me on this, it’s not just food; it’s magic in the form of baked goods.
Why This Matters
Here’s the thing: when life feels overwhelming, a warm slice of banana bread cobbler can literally change your mood. It says, “I care” without the cheesiness of a Hallmark card. This recipe is what to cook when you’ve had a rough day—and we all have them—to remind yourself that sweetness still exists in the world, especially when topped with a scoop of vanilla ice cream. It’s an antidote to the chaos of life, a hug in dessert form, and an opportunity to take a moment for yourself or to share with someone who could use a little pick-me-up.
Before You Start
Before we dive into this life-changing recipe, here are a few practical pieces of advice:
- If you only have crunchy peanut butter instead of smooth for the topping, don’t panic—it’ll just add a delightful texture (and extra nutty flavour).
- The one tool that makes this infinitely easier? A trusty spatula. (Seriously, if you go to bed with one kitchen item, make it this—no more batter on your fingers!)
- What to do if your toddler starts melting down at step 3 (speaking from experience): have a bowl of flour and a measuring cup ready for them to “help.” It’ll keep them busy and less likely to take a dive into the actual batter.
- Pour yourself a glass of white wine while cooking because if you’re going to spend time in the kitchen, you might as well enjoy it a little, am I right?
The Ingredients List with Personal Notes
- 3 ripe bananas, mashed (The riper, the better! I find that they taste sweeter and have a more intense flavour.)
- 1/2 cup brown sugar (You could use white sugar, but brown gives the cobbler a lovely depth—I use light brown because it’s what I have on hand.)
- 1/4 cup melted butter (I use unsalted because you can always add salt later if you need—it gives me control!)
- 2 eggs, beaten (I might have been known to forget the eggs once… Let’s just say the result isn’t a pretty sight.)
- 1 tsp vanilla extract (Always use the good stuff, like the one from Home Bargains—I swear it makes such a difference.)
- 1 tsp baking soda (No one likes a dense cobbler; this helps it rise—believe me, too much baking soda will taste like regret.)
- 1/8 tsp salt (I use sea salt because my grandma did, but any salt works fine.)
- 1 cup all-purpose flour (You can sub half with whole wheat for a bit of extra nutrition, but let’s be honest, this is comfort food!)
- 1/2 cup crunchy peanut butter (totally optional, but it adds a yummy twist if you want to feel fancy.)
- 1/2 cup chocolate chips (I don’t need to explain why, do I? Everyone loves chocolate.)
- Optional: whipped cream or vanilla ice cream for serving (This is non-negotiable—who doesn’t want a warm dessert topped with ice cream?)
The Step-by-Step with Stories
Step 1: Preheat Your Oven
The Practical Instruction: Preheat your oven to 350°F (175°C).
The Human Insight: Preheating is essential because it helps the baking process start off right. If you’re putting your batter into a cold oven, you could end up with banana mush instead of that glorious gooey texture we’re after.
Anecdote: I used to skip this step, thinking it would save time. Well, my friend, nothing says regret like waiting for a loaf to come out of the oven just to find it’s a pancake in the middle.
Step 2: Combine Ingredients
The Practical Instruction: In a large mixing bowl, mash the bananas. Then, mix in the brown sugar, melted butter, beaten eggs, and vanilla extract until completely combined.
Why This Matters: Combining the wet ingredients first ensures that everything blends well and absorbs that lovely banana flavour evenly.
Common mistake: Don’t skip mashing the bananas too smooth—leave a few lumps for texture. Trust me, it’s nicer to have those little bits in the cobbler.
My personal hack: Try a hand mixer for this step if you’re not a fan of banana lumps—it’ll get everything nicely blended without extra dishes.
Anecdote: This step always reminds me of my son Ben’s first baking attempt—he had more banana on his face than in the bowl, but oh, the laughter that followed was worth every squishy banana!
Step 3: Add Dry Ingredients
The Practical Instruction: Stir in baking soda, salt, and flour until just combined. Be careful not to overmix!
The Human Insight: Overmixing can lead to a tougher cobbler, which we definitely don’t want. A few lumps are perfectly fine here—think of them as little surprises waiting to be discovered.
What can be prepped during this time: While stirring, you could measure out your chocolate chips and peanut butter for step 4.
Anecdote: I can’t tell you how many times I’ve completely disregarded this advice and ended up with dense cobbler. Learn from my mistakes, please!
Step 4: Fold in Tasty Add-Ins
The Practical Instruction: Gently fold in the peanut butter and chocolate chips until they’re evenly distributed.
The Sensory Cue: You’ll know it’s ready when you see the chocolate chips peeking through the batter, all shiny and beckoning.
Anecdote: The first time I added peanut butter, my husband couldn’t believe his taste buds—“you’ve created a new dessert!” he declared, and now it’s a classic at our house.
Step 5: Pour and Bake
The Practical Instruction: Pour the mixture into a greased baking dish. Bake for about 25-30 minutes or until a toothpick inserted into the centre comes out clean.
Why this step matters: This ensures the centre will Cook fully, and the gooey twist we want will form beautifully around your chocolate chips.
Common mistake: If you peek too often through the oven door, the temperature drops! Just trust the process.
Anecdote: I still remember the first time I pulled the cobbler out with gooey chocolate chips oozing across the top. I felt like a baking rockstar!
Troubleshooting Real Life
- If you burn the bottom: Don’t panic; these things happen! Just slice off the burnt edges and enjoy the rest. If it’s truly blackened, maybe have some ice cream ready as a distraction.
- If you’re out of chocolate chips: You can swap with chopped nuts or dried fruit, but I really wouldn’t recommend it. The world needs chocolate!
- If you need to pause because a kid emergency arises: Just cover your batter with a damp towel. It should be more than happy to wait a few minutes while you take care of business.
- If it’s just not working: Just remember, not everything can be salvaged. Embrace it and order takeaway—maybe a pizza? (Can you tell I’m speaking from experience?)
The Serving Story
I serve this banana bread cobbler in a vintage glass bowl I bought at a flea market because it just feels special that way.
The perfect side is a scoop of vanilla ice cream (I get mine from the local dairy) but honestly, sometimes we eat it straight from the pan, especially on a lazy Sunday. Nothing quite feels as comforting as sharing, right?
And leftovers? Oh, don’t even worry about it. They taste even better because the flavours have had a chance to mingle, and honestly? You might find yourself secretly looking forward to breakfast the next day.
The "When I Make This" Story
I usually make this on a Sunday afternoon, especially now as the leaves change colour. It feels like the season is begging for warm, homey desserts, and this one fits the bill perfectly. While it bakes, I might fold a pile of laundry or watch a few minutes of my latest binge—because why not multitask?
We love to eat it in the living room while watching a family movie, everyone getting comfy in our big blankets. The cleanup usually takes about 20 minutes, but it’s worth every sticky moment spent because it means a house filled with laughter and love.
The Conversational Close
This banana bread cobbler has been through ups and downs with our family. It has witnessed birthday celebrations, comforting moments after a long week, and casual Sunday afternoons when life feels just a little heavier.
Maybe it’s not perfect, but it’s beautiful in its own messy, gooey way, just like life. I’d love to hear if you make it—tag me on social or just enjoy it quietly and reflect. What’s your go-to comfort food? Mine changes, but right now? It’s definitely this.
Enjoy, my friends! 🍌🍞

Banana Bread Cobbler
Ingredients
Method
- Preheat your oven to 350°F (175°C).
- In a large mixing bowl, mash the bananas. Mix in the brown sugar, melted butter, beaten eggs, and vanilla extract until completely combined.
- Stir in the baking soda, salt, and flour until just combined. Be careful not to overmix!
- Gently fold in the peanut butter and chocolate chips until evenly distributed.
- Pour the mixture into a greased baking dish. Bake for about 25-30 minutes or until a toothpick inserted into the center comes out clean.