
The Key Lime Cookies That Took Me a Decade to Perfect
Honestly, the first time I attempted to make Key Lime Cookies, I had flour everywhere (and I mean everywhere). My kitchen looked like a baking tornado had touched down, and I was left standing there—flour in my hair, tears of frustration streaming down my face—wondering how cookies could possibly elude me. My daughter, Lily, peeked around the corner and, with all the innocent wisdom of an eight-year-old, said, “Mum, are you trying to bake or build a sandcastle?” Well, that tagline has stuck ever since. Fast forward a decade, and this very recipe has become a beloved staple in our home, the go-to treat to lift us from the dullest of days. If you’re curious, let me save you from the messy mishaps I had on my culinary journey and guide you toward cookie bliss.
Why This Matters
These Key Lime Cookies are more than just a sweet treat; they’re a burst of sunshine, perfect for brightening gloomy days (trust me, we all have them). When life feels heavy or stressful—especially during these long winter months—these cookies deliver the exact dose of joy we need. Not to mention, they’re absolutely delightful for garden parties, summer barbecues, or simply when you need to impress your mates on a casual tea afternoon.
And if you’re anything like me, you’ll be secretly delighted to have a recipe that makes people think you’re a baking wizard when, really, you’ve only mastered a handful of key steps. So, let’s get started with my beloved Key Lime Cookies that will have everyone asking for the recipe (which you can now confidently give them)!
Before You Start
- If you only have regular limes instead of key limes, don’t fret; it changes the flavour but keeps the concept alive. Just adjust the sugar a pinch or two since regular limes are less sweet.
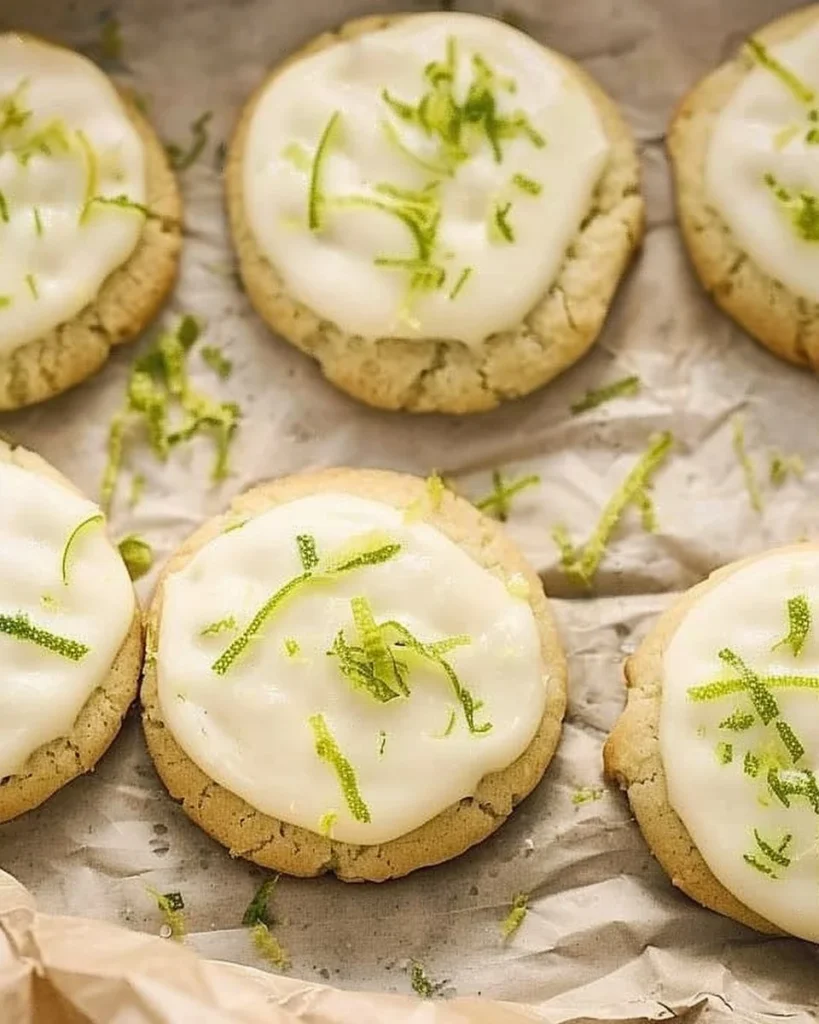
- The one tool that makes this infinitely easier is a microplane grater. Seriously, if you haven’t got one, do yourself a favour and grab it—your zest game will be elevated.
- If your toddler starts melting down halfway through, pause and let them help zest the limes (a great distraction). Just be ready for a few errant zest explosions.
- And because it’s a biscuit kinda day every day, pour yourself a lovely cup of chamomile tea while you mix these cookies!
Ingredients
- 2 cups all-purpose flour (you can use a gluten-free blend if you prefer; I once used a bargain brand and lived to tell the tale!)
- 1 tsp baking powder (baking powder is like the magic fairy dust; it lifts the cookies!)
- ½ tsp baking soda (don’t skip this; I made that mistake, and it’s a flat tragedy)
- ½ tsp salt (I use sea salt because my grandma insisted it has more flavour)
- ¾ cup unsalted butter, softened (the secret to soft cookies; never use margarine – it just doesn’t compare)
- 1 cup granulated sugar (okay, fine, I sometimes sneak a bit of brown sugar in for that extra depth of flavour)
- 1 large egg (local if you can; love supporting those small farms)
- 2 tsp pure vanilla extract (the good stuff is worth the splurge)
- 2 tbsp key lime juice (freshly squeezed—because anything else just doesn’t cut it)
- Zest of 2 key limes (my daughter loves grating them, which makes for fun kitchen bonding)
- Powdered sugar for dusting (because we like a little glamour, don’t we?)
Step-by-Step Instructions
Step 1: Preheat Your Oven
Preheat your oven to 350°F (175°C).
Why this step matters: Starting with a hot oven ensures your cookies bake evenly.
Common mistake here: People often forget this part and end up with flat, sad cookies!
If you’re multitasking: This is a perfect time to grab your zester and get the key lime zest ready.
Sensory cue: You’ll know it’s ready when you can hear that little pop from the oven as it kicks to life.
Step 2: Mix the Dry Ingredients
In a medium bowl, whisk together the flour, baking powder, baking soda, and salt.
Why this step matters: Combining these helps the leavening agents to distribute evenly, ensuring the cookies rise perfectly.
My personal hack: A fork is great for whisking if you don’t have a specific whisk—it gets the job done with zero fuss.
Step 3: Cream the Butter and Sugar
In a large bowl, beat the softened butter and granulated sugar together until light and fluffy (this should take about 2-3 minutes).
Why this step matters: This aerates the butter, giving your cookies that lovely light texture.
Common mistake: Overbeating can lead to a greasy mixture, so stop when it gets fluffy but not overly fluffy.
Personal insight: This is the step where I remember my late brother, Jamie, happily spinning the hand mixer as I frantically checked the recipe. Good times!
Step 4: Add the Egg and Flavours
Now, add the egg, vanilla extract, key lime juice, and zest to the butter-sugar mixture. Beat until well combined.
This is where it gets exciting: The zesty smell will make you swoon—seriously, it’s heavenly!
If you ever feel like it’s too dry: Add a teaspoon of key lime juice until it feels just right.
Step 5: Combine Wet and Dry Ingredients
Gradually incorporate the dry ingredients into the wet mixture, mixing just until combined—no need for an arm workout here!
Why this step matters: Overmixing leads to tough cookies. No one wants a biscuit that feels like half a brick!
This is also where my secret weapon comes in: I always put on a lively playlist, and it turns my baking into a dance party. You know it’s good when your whisking turns into a dramatic move!
Step 6: Scoop and Bake
Using a tablespoon, scoop the dough onto a parchment-lined baking sheet. Space them out about 2 inches apart—like leaving room for friends at dinner!
Pop them in the preheated oven for about 10-12 minutes or until the edges are lightly golden brown.
The sensory cue: You’ll know they’re done when your kitchen smells like a tropical paradise!
Step 7: Let Them Cool
Remove the cookies from the oven and let them cool on the baking sheet for about 5 minutes before transferring them to a wire rack.
Let me admit: I usually attempt sneaking one while they’re still hot (who can resist?).
Troubleshooting Real Life
-
If you burn the bottom: Don’t panic. Just scrape off the black bits and enjoy the rest. A little dark never hurt anyone, right?
-
If you’re out of key limes: Regular limes will do—just be mindful to taste as you go for balance.
-
If you need to pause because of a kid emergency: Simply cover the dough with plastic wrap and chill it in the fridge. It’ll hold up nicely for a bit.
Serving Story
I serve these cookies on my grandma’s old floral plate, which instantly brings back warmth and nostalgia (maybe it’s just me).
The perfect side is a dollop of fresh whipped cream on the side, but honestly, they’re delightful just as they are. The leftovers taste even better the next day as the flavours deepen, so don’t worry about making a hefty batch!
When I Make This
I usually make these cookies on lazy Saturdays where we have nowhere to be and the sun is shining through the kitchen window. While they bake, I can often be found folding laundry or calling my best mate, Jen, for a good chat.
We eat them while sprawled out on the sofa, no judgement—just comfy PJs, warm cookies, and a good movie. The cleanup takes about 15 minutes, but honestly, it’s worth every crumb because those little bites of joy are what make the day truly special.
Conversational Close
This Key Lime Cookies recipe has seen me through everything—rainy days, sunny afternoons, and family gatherings. It might not be perfect, but it’s ours, and that makes it beautifully imperfect.
I’d absolutely love to hear if you give it a go—tag me when you make them or just enjoy them quietly with a cup of tea; either option is wonderful! What’s your go-to comfort food? Mine changes, but right now, it’s these zesty little wonders.
Final Thoughts
As we dive into the seasons ahead, remember that these cookies will bring a slice of summer to the coldest days. With each delightful bite, may you feel a sprinkle of sunshine appearing in your kitchen—and perhaps a little spark of joy in your heart!
Key Lime Cookies
Ingredients
Method
- Preheat your oven to 350°F (175°C).
- In a medium bowl, whisk together the flour, baking powder, baking soda, and salt.
- In a large bowl, beat the softened butter and granulated sugar together until light and fluffy (about 2-3 minutes).
- Add the egg, vanilla extract, key lime juice, and zest to the butter-sugar mixture. Beat until well combined.
- Gradually incorporate the dry ingredients into the wet mixture, mixing just until combined.
- Using a tablespoon, scoop the dough onto a parchment-lined baking sheet, spacing them about 2 inches apart.
- Pop the cookies in the preheated oven for about 10-12 minutes or until the edges are lightly golden brown.
- Remove the cookies from the oven and let them cool on the baking sheet for about 5 minutes before transferring to a wire rack.